


Custom Crafts Blog
Home » Custom Crafts Blog » How to Make Name Badges: A Comprehensive Guide for Every Occasion
How to Make Name Badges: A Comprehensive Guide for Every Occasion
Table of Contents
Name badges are small but powerful tools that bridge gaps, build connections, and reinforce professionalism in every setting—from corporate offices and conferences to schools, retail stores, and community events. A well-made name badge does more than just display a name; it fosters trust, simplifies communication, and elevates your brand or event’s credibility. Whether you’re a small business owner needing employee ID badges, an event planner preparing for a conference, or a teacher organizing a classroom, learning how to make name badges that are functional, durable, and visually appealing is a skill that pays off.
In this ultimate guide, we’ll walk you through everything you need to know about making name badges—from choosing the right materials and tools to designing, printing, and assembling badges for any purpose. We’ll cover DIY methods for small batches, professional printing options for large orders, and tips to avoid common mistakes that can ruin your project. By the end of this article, you’ll have the knowledge and confidence to create name badges that stand out, serve their purpose, and leave a lasting impression.
Chapter 1: Understanding Name Badges—Purpose, Types, and Key Considerations
Before diving into the “how-to,” it’s important to understand what makes a great name badge and how to tailor it to your specific needs. Name badges come in all shapes, sizes, and styles, and the best choice depends on your use case, budget, and audience. Let’s start by breaking down the basics.
1.1 The Purpose of Name Badges
Name badges serve three core functions, regardless of the setting:
- Identification: The most obvious purpose—helping people quickly learn each other’s names. This is critical in networking events, new employee onboarding, or customer-facing roles where familiarity builds trust.
- Professionalism: A polished name badge signals that you take your role (and your audience) seriously. It adds a level of formality to corporate environments, retail stores, and service industries, making customers and clients feel more comfortable.
- Branding & Organization: Name badges can include logos, company colors, or role designations (e.g., “Speaker,” “Volunteer,” “Manager”), reinforcing brand identity and helping organize groups of people. For events, color-coded badges can even indicate access levels (e.g., VIP, General Admission).
1.2 Common Types of Name Badges
Not all name badges are created equal. The type you choose will depend on how often it’s used, the environment it’s in, and your aesthetic preferences. Here are the most popular options:
1.2.1 Clip-On or Pin-Back Badges
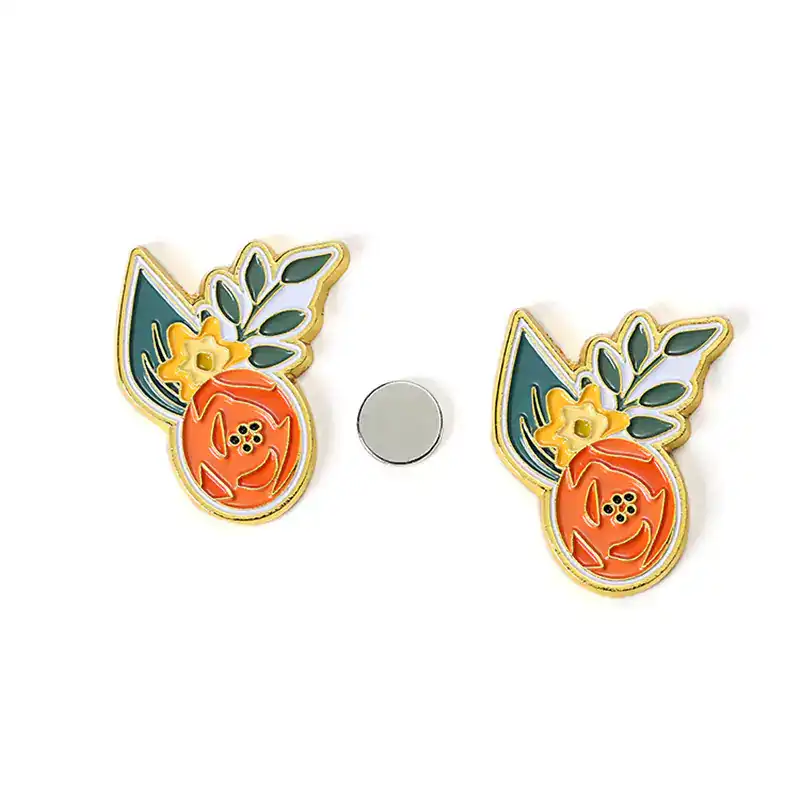
These are the most common and affordable name badges, ideal for temporary use (e.g., one-day events, interns) or casual settings. They attach to clothing using a metal clip, pin, or magnet. Magnetic backings are a popular upgrade—they’re gentle on fabrics and won’t leave holes, making them perfect for professional attire like suits or blouses .
Best for: Conferences, workshops, temporary staff, volunteer events.
1.2.2 Lanyard Badges
Lanyard badges hang around the neck, making them highly visible and hands-free. They’re great for large events (e.g., trade shows, conventions) where people need to be easily identified from a distance. Lanyards can also be customized with logos or event themes to boost branding .
Best for: Trade shows, conferences, school events, large gatherings.
1.2.3 Magnetic Badges
As mentioned earlier, magnetic badges use strong magnets to attach to clothing, eliminating the need for pins or clips. They’re durable, professional, and ideal for daily use—perfect for corporate employees, managers, or anyone who wears a badge regularly .
Best for: Corporate offices, retail staff, long-term use.
1.2.4 Reusable Badges
Reusable badges (often made of plastic or acrylic) have a slot or pocket where you can insert a paper insert with a name. This is a cost-effective option for settings where names change frequently (e.g., schools, temporary events, rotating staff). You can simply replace the insert instead of making a new badge .
Best for: Schools, volunteer programs, temporary events, rotating roles.
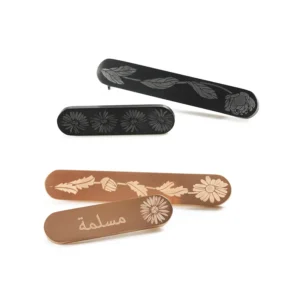
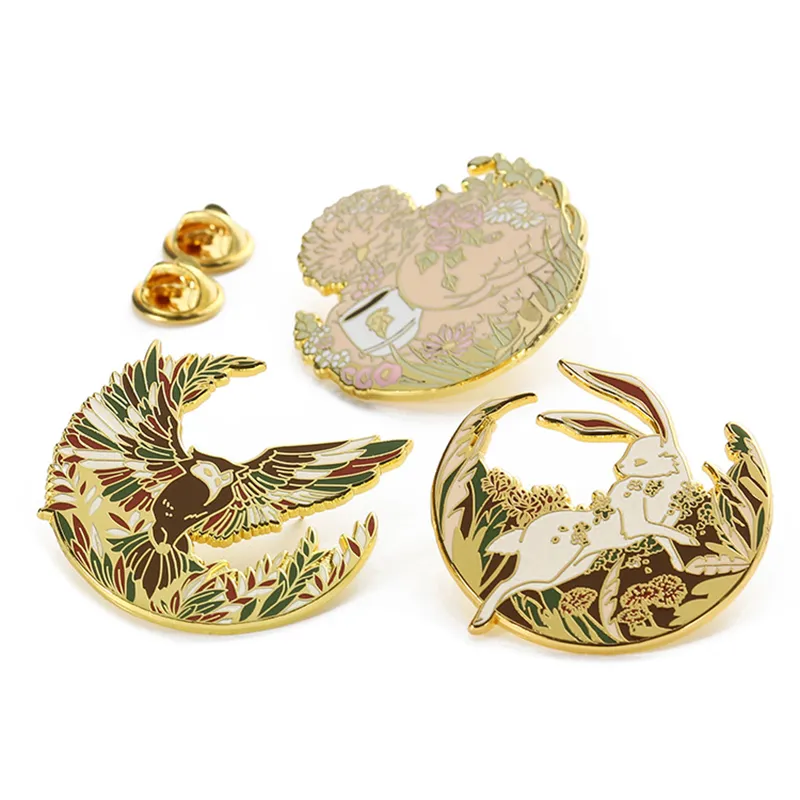
1.2.5 Custom Shaped or Premium Badges
For a more unique look, custom-shaped badges (e.g., logo-shaped, circular, oval) or premium materials (e.g., metal, leather, engraved acrylic) are great options. These badges are more expensive but make a strong impression, ideal for executive teams, brand launches, or high-end events .
Best for: Executive staff, brand events, award ceremonies, luxury retail.
1.3 Key Considerations Before You Start
Before you begin making name badges, ask yourself these questions to ensure you create a product that meets your needs:
- How many badges do you need?: A small batch (10–20 badges) is perfect for DIY, while large orders (50+) may require professional printing to save time and ensure consistency .
- How long will the badges be used?: Temporary badges (one-time events) can be simple and affordable (e.g., paper with a clip), while long-term badges (daily use) need to be durable (e.g., plastic, metal) .
- What environment will they be in?: Badges used outdoors or in busy settings (e.g., retail, construction) need to be water-resistant and durable. Indoor badges (e.g., office, classroom) can be more lightweight .
- What information needs to be included?: The basics are usually a name and title/role, but you may also want to add a logo, company name, contact info, or access level (e.g., “Staff Only”) .
- What’s your budget?: DIY badges can cost as little as $1–$2 per badge, while professional or premium badges can cost $5–$20+ per badge .
Chapter 2: Tools and Materials You’ll Need
The tools and materials you need will depend on whether you’re making DIY badges or working with a professional printer. We’ll cover both options, so you can choose the one that fits your needs and budget.
2.1 DIY Name Badge Tools & Materials
DIY name badges are perfect for small batches, last-minute needs, or anyone who wants to save money. Here’s what you’ll need, organized by category:
2.1.1 Base Materials (Choose One)
- Cardstock: The most affordable option—choose heavyweight cardstock (80–110 lb) for durability. It’s easy to cut, print on, and customize. Opt for matte or glossy finishes depending on your design .
- Plastic Sheets: Clear or colored plastic (e.g., acrylic, PVC) is more durable than cardstock and water-resistant. It’s ideal for badges that will be used multiple times .
- Metal Blanks: For a premium look, use metal blanks (aluminum, brass) that can be engraved or printed on. These are more expensive but long-lasting .
2.1.2 Printing Supplies
- Printer: A home inkjet or laser printer works for cardstock or lightweight plastic. For better quality (e.g., sharp logos, vibrant colors), use a color laser printer .
- Ink/Cartridges: Ensure you have enough ink—color ink is recommended for logos or branded badges. For long-lasting prints, use waterproof ink .
- Transfer Paper: If you’re printing on metal or plastic, you may need heat transfer paper to ensure the design adheres properly .
2.1.3 Cutting Tools
- Scissors: For simple straight cuts—best for small batches.
- Paper Cutter: For clean, straight cuts on multiple badges at once. A guillotine-style cutter is ideal .
- Die Cutter: For custom shapes (e.g., circles, ovals, logo shapes). A manual die cutter (like a Cricut) is perfect for DIYers and allows for precise cuts .
- Utility Knife: For detailed cuts or trimming edges (use with a cutting mat to protect surfaces).
2.1.4 Attachment Tools
- Badge Clips/Pins: Simple metal clips or pins that attach to clothing. Magnetic clips are a better option for delicate fabrics .
- Lanyards: Choose lanyards in your brand color or with a custom logo. They come in different materials (nylon, polyester) and widths .
- Adhesive: Double-sided tape, glue sticks, or epoxy resin (for sealing plastic or metal badges). Avoid regular glue, as it may smudge or warp the paper .
- Badge Holders: Clear plastic holders that protect paper badges. They come with clips or lanyard attachments and are reusable .
2.1.5 Design Tools
- Design Software: Free options like Canva, Google Docs, or Microsoft Word work well for simple designs. For more advanced designs, use Adobe Photoshop or Illustrator .
- Templates: Many websites (e.g., Canva, Avery) offer free name badge templates that you can customize with your text and logo. This saves time and ensures a professional look .
- Logo/Images: Have your company logo or event graphic saved as a high-resolution file (PNG or JPG) to avoid blurriness .
2.2 Professional Printing Materials & Tools
If you need large batches (50+ badges) or a more polished look, professional printing is the way to go. Professional printers use high-quality materials and equipment that DIYers can’t match, including:
- Premium Materials: Metal (aluminum, brass), acrylic, leather, or high-quality plastic. These materials are more durable and visually appealing .
- Advanced Printing Methods: Digital printing, screen printing, or engraving for sharp, long-lasting designs. Engraving is ideal for metal badges, while digital printing works well for colorful designs .
- Custom Finishes: Matte, glossy, or metallic finishes, as well as laminating to protect the badge from scratches and water damage .
- Professional Attachment Options: High-quality magnetic backings, lanyards, or clips that are more durable than DIY options .
When working with a professional printer, you’ll need to provide a high-resolution design file (PDF, PNG, or AI) and specify your material, size, and attachment preferences. Most printers offer free design proofs, so you can review the badge before it’s printed .

Chapter 3: Step-by-Step Guide to Making DIY Name Badges
Now that you have your tools and materials, let’s walk through the process of making DIY name badges. We’ll cover three common DIY methods: paper/cardstock badges, plastic badges, and reusable insert badges. Choose the method that fits your needs.
3.1 Method 1: Simple Paper/Cardstock Name Badges (Temporary Use)
This is the easiest and most affordable DIY method, perfect for one-time events, volunteers, or interns. It takes about 10–15 minutes per batch of 10 badges.
Step 1: Choose Your Design & Template
Start by deciding on your design. Open a design tool (Canva, Google Docs, or Microsoft Word) and search for “name badge templates.” Choose a template that fits your occasion—for example, a professional template for a conference or a fun, colorful template for a school event .
Customize the template with the following information (adjust based on your needs):
- Name (use a large, easy-to-read font—14–16pt for first names, 12pt for last names)
- Title/Role (e.g., “Speaker,” “Volunteer,” “Intern”)
- Company/Event Name (optional)
- Logo (if applicable—ensure it’s high-resolution to avoid blurriness)
Tips for design: Use contrasting colors (e.g., white text on a dark background) to make the name easy to read from a distance. Avoid fancy fonts that are hard to read—stick to sans-serif fonts like Arial, Helvetica, or Calibri .
Step 2: Print the Badges
Load your heavyweight cardstock into your printer. Before printing the entire batch, print a test page to check for alignment, color, and readability. Adjust the design if needed (e.g., resize text, fix logo placement) .
Once the test page looks good, print the full batch. If you’re using a color printer, ensure the ink is dry before handling the paper to avoid smudging.
Step 3: Cut the Badges
Use a paper cutter or scissors to cut out each badge. For clean, straight cuts, use a guillotine paper cutter—this is especially important if you’re making multiple badges. If you want a custom shape (e.g., circle, oval), use a die cutter to cut around the template .
Trim any excess paper and smooth the edges with sandpaper if needed to avoid sharp corners.
Step 4: Attach the Clip/Pin
Flip the badge over and attach your clip, pin, or magnetic backing. For clips or pins, use double-sided tape or glue to secure them to the back of the badge. For magnetic backings, ensure the magnet is centered so the badge hangs straight .
Allow the glue to dry completely (about 10–15 minutes) before wearing the badge.
Step 5: (Optional) Laminate for Durability
If the badges will be used multiple times or in a busy environment, laminate them to protect against water, scratches, and wear. Cut the laminated badge leaving a small border (about 1/8 inch) around the edge to seal it properly .
3.2 Method 2: Plastic Name Badges (Durable, Reusable)
Plastic badges are more durable than paper badges and can be reused multiple times. They’re ideal for staff members who wear badges daily or events that last several days.
Step 1: Gather Materials
You’ll need: Clear plastic sheets (acrylic or PVC), cardstock (for the insert), design software, printer, paper cutter, die cutter (optional), adhesive, and a badge clip/magnetic backing .
Step 2: Design the Insert
Create a design for the insert using your design tool. The insert should be slightly smaller than the plastic sheet (about 1/8 inch smaller on all sides) so it fits inside the plastic without overlapping .
Include the same information as the paper badge (name, title, logo) and print it on cardstock. Cut out the insert with a paper cutter or die cutter.
Step 3: Prepare the Plastic Sheet
Cut the plastic sheet to your desired badge size using a utility knife or die cutter. If using acrylic, be careful—acrylic is brittle and can crack if cut too quickly. Use a cutting mat to protect your surface .
If the plastic is cloudy, wipe it with a microfiber cloth to remove any dust or fingerprints.
Step 4: Assemble the Badge
Apply a small amount of adhesive to the back of the plastic sheet (avoid getting adhesive on the front, as it will show through). Place the insert on top of the adhesive, centering it carefully. Press down firmly to ensure it’s secure .
If you want a double-sided badge, cut two plastic sheets and two inserts. Glue the inserts to both sides of a thin piece of cardboard (for stability) and then glue the plastic sheets on top.
Step 5: Attach the Clip/Magnetic Backing
Glue the clip, pin, or magnetic backing to the back of the plastic badge. Allow the glue to dry for at least 30 minutes (epoxy resin is recommended for plastic, as it’s more durable than regular glue) .
3.3 Method 3: Reusable Insert Badges (Cost-Effective for Rotating Staff)
Reusable insert badges are perfect for settings where names change frequently (e.g., schools, volunteer programs, temporary events). The badge itself is a plastic or metal holder, and you can replace the paper insert whenever needed .
Step 1: Purchase a Reusable Badge Holder
Buy reusable badge holders (available online or at office supply stores). They come in various sizes and styles—choose one that fits your insert size (e.g., 3×4 inches is standard) .
Step 2: Design and Print the Insert
Create a design for the insert using your design tool. The insert should fit perfectly inside the badge holder—measure the holder first to ensure the insert is the right size. Print the insert on cardstock or regular paper (cardstock is more durable) .
Step 3: Cut and Insert the Paper
Cut the insert to size using a paper cutter. Slide the insert into the badge holder—most holders have a slot or opening on the side or top. Ensure the insert is centered and easy to read .
Step 4: Attach the Holder to a Lanyard or Clip
Most reusable badge holders come with a built-in lanyard attachment or clip. If not, glue a clip or magnetic backing to the back of the holder. You can also thread a lanyard through the attachment hole .
Chapter 4: Design Tips for Professional-Looking Name Badges
Even a DIY name badge can look professional with the right design. Here are our top design tips to make your badges stand out for all the right reasons:
4.1 Keep It Simple
Less is more when it comes to name badges. Avoid overcrowding the badge with too much information—stick to the essentials (name, title, logo). A cluttered badge is hard to read and looks unprofessional .
4.2 Prioritize Readability
The most important part of a name badge is the name—make sure it’s easy to read from a distance (at least 3–5 feet away). Use a large font (14–18pt for first names) and contrasting colors (e.g., black text on white, white text on navy). Avoid light colors on light backgrounds or dark colors on dark backgrounds .
Font choice matters: Stick to sans-serif fonts like Arial, Helvetica, or Calibri. These fonts are clean and easy to read, even from a distance. Avoid script or decorative fonts, as they can be hard to read .
4.3 Use Branding Consistently
If you’re making badges for a company or event, use your brand colors, logo, and fonts to reinforce your identity. For example, if your company’s primary color is blue, use blue as an accent color on the badge. Ensure the logo is sized appropriately—too large, and it will overshadow the name; too small, and it won’t be recognizable .
4.4 Choose the Right Size
The standard name badge size is 3×4 inches (lanyard badges) or 2×3 inches (clip-on badges). This size is large enough to be readable but small enough to be unobtrusive. Avoid making badges too small (hard to read) or too large (bulky and uncomfortable) .
4.5 Add Visual Interest (Without Overdoing It)
You can add subtle visual elements to make your badges more appealing—for example, a thin border, a small icon (e.g., a star for volunteers), or a gradient background. Just make sure these elements don’t distract from the name and key information .
4.6 Test the Design Before Printing
Always print a test page before printing the entire batch. Check for alignment (is the text centered?), color (are the colors accurate?), and readability (is the name easy to read?). Make adjustments as needed to avoid wasting materials .
Chapter 5: Professional Printing: When to Use It and How to Prepare
DIY badges are great for small batches, but there are times when professional printing is the better choice. Here’s when to opt for professional printing and how to prepare your design for the printer.
5.1 When to Choose Professional Printing
Professional printing is ideal in the following scenarios :
- Large batches (50+ badges): DIYing large batches is time-consuming and can lead to inconsistencies (e.g., uneven cuts, color variations). Professional printers can produce large quantities quickly and uniformly.
- Premium materials: If you want metal, acrylic, or leather badges, professional printers have the equipment to work with these materials (e.g., engraving machines for metal) .
- High-quality designs: If you need sharp logos, vibrant colors, or custom finishes (e.g., glossy, metallic), professional printers use advanced technology that DIY printers can’t match .
- Time constraints: If you’re short on time, professional printers can handle the design, printing, and assembly for you, saving you hours of work .
5.2 How to Prepare Your Design for Professional Printing
To ensure your professional badges turn out perfectly, follow these steps:
Step 1: Choose a Reputable Printer
Research professional printers that specialize in name badges. Look for reviews, samples, and pricing to find one that fits your budget and needs. Many online printers (e.g., FedEx Office, Avery, NameBadge.com) offer name badge services and free design proofs .
Step 2: Prepare Your Design File
Professional printers require high-resolution design files to ensure sharp, clear prints. Here’s what you need to know :
- File format: Use PDF, PNG, or AI (Adobe Illustrator) files. Avoid JPG files if possible, as they can be blurry when enlarged.
- Resolution: The file should be 300 DPI (dots per inch) to ensure clarity. Low-resolution files (72 DPI) will look blurry when printed .
- Bleed: Add a 1/8-inch bleed to your design. Bleed is the area outside the badge that will be trimmed off—this ensures there are no white borders around the edge of the badge .
- Text safety zone: Keep all text and logos at least 1/8 inch away from the edge of the badge to avoid them being trimmed off .
Step 3: Specify Your Requirements
When placing your order, be clear about your requirements:
- Material: Specify the material you want (e.g., metal, acrylic, plastic) .
- Size: Choose the badge size (e.g., 3×4 inches, 2×3 inches) .
- Attachment: Specify the attachment type (e.g., magnetic backing, lanyard, clip) .
- Finish: Choose a finish (e.g., matte, glossy, laminated) .
- Quantity: Let the printer know how many badges you need.
Step 4: Review the Proof
Most professional printers will send you a digital proof of your badge before printing. Review the proof carefully to check for alignment, color, text, and logo placement. If you notice any issues, contact the printer to make adjustments .
Step 5: Place Your Order and Wait for Delivery
Once you approve the proof, place your order. The delivery time will depend on the printer and the quantity of badges—most printers take 3–7 business days for standard orders. Rush orders are available for an additional fee .
Chapter 6: Common Mistakes to Avoid When Making Name Badges
Even the most experienced DIYers make mistakes when making name badges. Here are the most common mistakes and how to avoid them :
6.1 Choosing the Wrong Material
Mistake: Using paper badges for long-term use or in harsh environments (e.g., outdoors, retail). Paper badges are not durable and will tear or get wet easily.
Fix: Choose the right material for your use case. Use paper for temporary events, plastic for reusable badges, and metal/acrylic for long-term, professional use .
6.2 Poor Readability
Mistake: Using small fonts, fancy fonts, or low-contrast colors (e.g., light gray text on white). This makes the name hard to read from a distance.
Fix: Use large, sans-serif fonts (14–18pt for first names) and contrasting colors. Test the readability by holding the badge 3–5 feet away—if you can’t read the name easily, adjust the font size or color .
6.3 Overcrowding the Badge
Mistake: Adding too much information (e.g., phone number, email, address) to the badge. This makes it cluttered and hard to read.
Fix: Stick to the essentials—name, title, and logo (if applicable). If you need to include additional information, keep it small and place it at the bottom of the badge .
6.4 Low-Quality Logos
Mistake: Using a low-resolution logo that looks blurry when printed. This makes the badge look unprofessional.
Fix: Use a high-resolution logo (300 DPI) saved as a PNG or AI file. If you don’t have a high-resolution logo, contact your company’s marketing team to get one .
6.5 Incorrect Sizing
Mistake: Making the badge too small (hard to read) or too large (bulky). The standard size is 3×4 inches for lanyard badges and 2×3 inches for clip-on badges.
Fix: Measure the badge size before printing. Test the size by cutting out a paper template and holding it up—if it’s too big or too small, adjust the design .
6.6 Using the Wrong Adhesive
Mistake: Using regular glue for plastic or metal badges. Regular glue may not adhere properly and can smudge or warp the design.
Fix: Use epoxy resin or double-sided tape for plastic and metal badges. These adhesives are more durable and won’t damage the badge .
6.7 Forgetting to Test Print
Mistake: Printing the entire batch without testing first. This can lead to alignment issues, color errors, or unreadable text—wasting time and materials.
Fix: Always print a test page first. Check for alignment, color, and readability, and adjust the design if needed .
Chapter 7: Maintenance and Care for Name Badges
To ensure your name badges last as long as possible, proper maintenance and care are essential. Here’s how to care for different types of badges:
7.1 Paper/Cardstock Badges
Paper badges are temporary, but you can extend their life by:
- Laminating them to protect against water and scratches .
- Avoiding exposure to water or moisture.
- Storing them in a dry, cool place when not in use.
7.2 Plastic/Acrylic Badges
Plastic and acrylic badges are durable but can scratch easily. Care for them by:
- Wiping them with a soft, dry cloth (microfiber works best) to remove dust and fingerprints.
- Avoiding harsh chemicals (e.g., bleach, alcohol) that can damage the surface.
- Storing them in a protective case or pouch when not in use.
7.3 Metal Badges
Metal badges are long-lasting but can tarnish over time. Care for them by:
- Wiping them with a polishing cloth (e.g., a silver polishing cloth) to remove tarnish and restore shine .
- Avoiding exposure to water or moisture, which can cause rust or tarnish.
- Storing them in a dry, airtight container when not in use.
7.4 Reusable Insert Badges
Reusable insert badges are easy to maintain:
- Replace the insert when it becomes worn or outdated .
- Wipe the plastic holder with a soft cloth to remove dust and fingerprints.
- Check the clip or magnetic backing regularly to ensure it’s secure.
Chapter 8: Creative Name Badge Ideas for Different Occasions
Name badges don’t have to be boring! Here are some creative ideas to make your badges stand out for different occasions:
8.1 Corporate/Office Badges
- Use your company’s brand colors and logo for a cohesive look. Add a subtle gradient background for visual interest .
- For executive teams, use metal badges with engraved text for a premium look .
- Add a QR code that links to the employee’s LinkedIn profile or company bio for networking.
8.2 Conferences/Trade Shows
- Color-code badges by industry or access level (e.g., red for VIP, blue for speakers, green for attendees) .
- Add a fun tagline or event theme (e.g., “Innovation Leader 2024”) to the badge .
- Use lanyards with the event logo and attach a small gift (e.g., a keychain) to the badge for a memorable touch.
8.3 School/Classroom Badges
- For students, use colorful, fun designs with icons (e.g., stars, animals) that match their grade level .
- For teachers, include the subject they teach (e.g., “Ms. Smith – Math”) and a small icon related to the subject (e.g., a calculator).
- Use reusable insert badges so students can keep the same badge all year and update the insert if needed.
8.4 Volunteer/Community Events
- Use bright, cheerful colors to make volunteers easily identifiable .
- Add the volunteer’s role (e.g., “Food Server,” “Greeter”) to the badge so attendees know who to ask for help.
- Include a small thank-you message (e.g., “Thank You for Volunteering!”) to show appreciation.
8.5 Weddings/Parties
- For weddings, use elegant designs with the couple’s names and wedding date. Add a small icon (e.g., a heart, ring) for a romantic touch.
- For parties, use fun, playful designs with the party theme (e.g., “Luau 2024,” “Halloween Bash”).
- Use custom-shaped badges (e.g., hearts, stars) to match the theme .
Chapter 9: Final Thoughts
Making name badges is a simple yet impactful task that can enhance professionalism, build connections, and reinforce branding. Whether you’re making DIY badges for a small event or working with a professional printer for a large order, the key is to focus on readability, durability, and alignment with your purpose.
By following the steps and tips in this guide, you’ll be able to create name badges that are functional, visually appealing, and tailored to your specific needs. Remember to avoid common mistakes, test your design before printing, and care for your badges to ensure they last as long as possible.
Whether you’re a business owner, event planner, teacher, or volunteer, a well-made name badge is a small investment that pays off in trust, communication, and professionalism. Now go ahead and create badges that make a lasting impression!
PRODUCT CATEGORIES
Do you want to have unique metal crafts?
Let's connect ASAP.
We are a professional manufacturer of custom metal crafts, we can create exquisite metal artworks for you according to your needs and preferences.